Showing posts with label Unboxing & Review. Show all posts

Monday, June 3, 2019

First Impression of Huawei P30 Pro, Mobile Photography Specialist

First Impression of Huawei P30 Pro, Mobile Photography Specialist

First Impression of Huawei P30 Pro, Mobile Photography Specialist.


The latest series of mobile photography specialists made by Huawei, the P30 Series slid in the middle of this week. Business has the opportunity to try out the P30 Pro, the most premium variant of the series developed by Huawei in collaboration with the Leica.

best phone ever


Like the other previous series, the P30 Pro features Huawei's unique color gradation design. The variant tried by Business carries the blue purplish sky called Huawei as the Crystal Breathing. The material that wraps the Huawei P30 Pro consists of an aluminum combination on the edge and a very reflective glass fiber like a mirror. 


With a 6.47-inch screen dimension, the P30 Pro is quite large. The body size of 8.41 mm thick which cones at the edges makes the Huawei P30 Pro right for the hand, although for some people the thin and tapered shape makes it feel uncomfortable to hold.

HUAWEI BEST MOBILE PROVIDER

Two physical buttons adorn the left side of the Huawei P30 Pro, namely the power button and volume button. At the bottom, Huawei places a USB Type-C slot for charging, a slot for two SIM cards, and a speaker hole. On the P30 Pro, there is no 3.5 mm slot for earphones. Huawei includes an earphone with a USB Type-C connection in the packaging box. However, for music enthusiasts who are still loyal to   3.5 mm connection earphones , they must give up their favorite accessories and move to wireless earphones  

Displayed OLED FHD + measuring 19: 5: 9 used by Huawei P30 Pro produces sharp images with high color contrast. Unlike OLED screens used by other vendors, the colors that appear on the P30 Pro tend to be cooler. This is once again, a matter of taste. OLED technology is marketed as a screen that produces very bright colors, some people may prefer colors that are "lighter" in the eye.
To present a bezel-less display on the P30 Pro, Huawei uses the dew drop design for the front camera, which is a small point in the center of the screen. On the front of the P30 Pro, there are also no holes for the speaker. Huawei uses Acoustic Display technology that transmits sound through the screen. Another plus point of this "screen vibration" technology is that the conversation between the other person is not heard by others. This also means the audio system for P30 Pro telephone conversations is separate from the audio system used to listen to music and videos using the speaker grill on the bottom of the phone.
The Android 9 Pie operating system with Huawei's EMUI 9 interface works seamlessly. The change between applications runs fast with a sensitive and reactive screen with a touch of a finger. The development also feels with application icons, that is, unlike the operating system in the previous version, the icons in the latest version feel more consistent with each other. 
The notification system and "drag menu" on the P30 Pro feel more like iOS than Android. One thing that is rather annoying is the connection selection menu such as Wi-Fi and Bluetooth only to turn on and off. Further options such as choosing a Wi-Fi network or Bluetooth devices that you want to connect to are not available instantly.
The P30 Pro battery itself has a powerful 4,200 mAh capacity to support all day activities, including photography activities that usually consume a lot of power. The refilling speed is also impressive. Every one percent of the power can be filled in just about 10 seconds. Unfortunately, the cable provided by Huawei along with the P30 Pro is not too long with a large charger  head  .
However, of course the most important feature of the P30 Pro is its photographic capability. Huawei P30 Pro uses the Leica Quad Camera System on the back of the main camera with 40 MP resolution sensor, 20 MP wide angle lens, 8 MP telephoto lens, and Time of Flight technology sensors. On the front of Huawei installed a 32 MP resolution selfie camera.
In a few simple experiments, the P30 Pro's telephoto capabilities have felt amazing. With the ability of physical zoom up to 5 times and hybrid up to 10 times, the P30 Pro is able to capture clear images. If enlarged up to 50 times, which means using digital magnification, the image is more broken but but clearly visible. Huawei P30 Pro is marketed in the Indonesian market at a price of Rp. 12,999,000.

Friday, May 17, 2019

Tips to save Phone when dropped into the water & How to know if your Smartphone is waterproof?

Tips to save Phone when dropped into the water & How to know if your Smartphone is waterproof?

Tips to save Phone when dropped into the water, adopt the good reflexes.


Because it follows you everywhere, your phone is never safe from a fall or shock. As the summer vacation approaches, the risk is great to see him dive into the pool or surf the rolls of the Atlantic beaches by clumsiness.

No phone appreciates water. Despite their waterproof properties, our Smartphone are fragile. Water and moisture weaken tablecloths and components. A risk of oxidation is also to be taken seriously because your Smartphone can become unusable.

What if my phone goes down?

What if my phone goes down? What reflexes to take to protect my phone from moisture? What solution to put in place if my phone does not turn on anymore since it took moisture?

Today, most phones are water , splash and dust resistant . Their degree of resistance is indicated by an IP rating in accordance with IEC 60529. Nevertheless, be aware that this resistance is not permanent and may decrease with normal wear.

Discover below 7 essential steps to make quickly if your phone falls into the water. And do not hesitate to share your experiences.

1. Remove your phone from the water quickly
Your phone fell into the water? Remove it as quickly as possible, without putting yourself in danger of course. Do not hesitate a second even if it is at the bottom of the toilet. The risks of corrosion of electrical circuits are even higher when immersed in salt water. In this case, rinse your phone with fresh water.

2. Dry the outer surface of your phone
As soon as you remove your phone from the water, dry it with a towel or clothing if you only have it on hand. In any case, it is thanks to your speed of reaction that you multiply the chances of finding a functional Smartphone, after an involuntary bath.

3. Turn off your phone
Turn off your phone immediately and do not try to turn it on again. Even if your phone is oxidized it may not be too late. Do not try to recharge it either. This manipulation could cause a short circuit on the motherboard and permanently render your Smartphone out of use.

4. Remove the battery from your phone
Remove the battery and sim card from your mobile if the model of your phone allows it. As with the previous steps, act immediately.

5. Dry the inside of your laptop
To dry the interior of your laptop, several solutions are available to you. You can use a dehumidifier or bags of silica gel beads. Simpler, you can also place your open phone in a bowl of raw rice, excellent moisture absorber. We also recommend storing your phone in a Quick Dryer . Whatever your choice, wait 24 / 48h before turning your phone back on.


6. Drop the fake good ideas
Drop "fake good ideas" such as putting your phone on a radiator, putting it in the oven or putting it in the hair dryer. You will not gain anything.

7. Deoxidize the motherboard and components
After 48 hours, if your phone does not turn back on or it malfunctions, your last chance lies in the deoxidation of the motherboard and components. You will find two methods on the site bricophone.com : the deoxidation kit and an ultrasound tank . A tutorial is available on the site to help you achieve this repair successfully.

How to deoxidize the motherboard and the components of your phone?

Simple to use, the deoxidation kit contains a mounting pattern and specific tools (pentalobe, triwing, suction cup, mediator) to easily open your phone. Once the device is open, simply spray your motherboard and components with the isopropanol spray. You will then see oxidation indicators also called moisture sensors (pellets) placed by the manufacturer. Originally white in color, these indicators will turn pink or red if your phone is oxidized. The ultrasound bin is also very efficient. Place your spare parts for a few minutes before reassembling your phone.

This repair is easy and will only take a few minutes. It is unfortunately not 100% guaranteed but if you want to recover all of your contacts, photos, music, deoxidation is the only solution.

An awkwardness never arriving alone, perhaps the moment has come to acquire a waterproof cover that will also protect your device against shocks.


How to know if your Smartphone is waterproof?


To distinguish them, waterproof Smartphone benefit from an IP protection rating. You will recognize it easily. It is mentioned by an abbreviation "IP" followed by two enigmatic figures. The first indicates the degree of resistance of the device to solid bodies such as dust and the second specifies its resistance to liquids.

The first digit changes from 0 to 6, from zero protection to full dust protection. The second passes from 0 to 9k, the latter figure indicating a protection for cleaning at high pressure and high temperature.

To make this standard of protection readable by all, a scale has been defined:

First number: resistance to solid bodies (dust)
  •          0 or X: no protection or protection not measured
  •          1: protection against solid bodies greater than 50 mm in diameter
  •          2: protection against solid bodies greater than 12.5 mm in diameter
  •          3: protection against solid bodies greater than 2.5 mm in diameter
  •          4: protection against solid bodies greater than 1 mm in diameter
  •          5: limited dust protection
  •          6: total protection against dust


Second number: resistance to liquids
  •          0 or X: no protection or protection not measured
  •          1: protection against vertical drops of water drops
  •          2: protection against drops of vertical drops of water (15 °)
  •          3: protection against rain (60 °)
  •          4: protection against splashing water (all directions)
  •          5: protection against water jets (all directions)
  •          6: protection against strong water jets (all directions)
  •          7: protection against immersion (maximum 1 meter for 30 minutes)
  •          8: protection against immersion (beyond 1 meter for 30 minutes)
  •          9: protection against immersion (beyond 1 meter for 30 minutes) and against high pressure cleaning
  •          9K: Protection against high pressure and high temperature cleaning


A device with an IP rating of 47 will provide protection against solid bodies with a diameter of more than 1 mm and resistance against immersion up to 1 meter deep for 30 minutes.

Smartphone IP68 or IP 69


If the IP68 standard has long been the most widespread, we are starting to see Smartphone with IP69 protection. These offer almost the best protection against water since they resist both immersion to 1 meter deep for 30 minutes and high pressure cleaning. An IP69 certified device is also generally hermetically sealed. IP69K models are still rare.

Obviously, it is better not to deliberately throw your phone in the water. First of all because the precautionary principle should prevail if you care about your Smartphone but also because the warranty often does not work if your device has taken a bath.

Waterproof Smartphone: watch out for water types

As bizarre as it may seem, waterproof phones are not resistant to all types of water.
In an article, the words of spokespersons of the Chinese brand Huawei and the Korean company Samsung. They specify that the IP standard certifies the resistance of Smartphone only against clear water.

It is therefore totally inadvisable to immerse your phone in sea water, soapy water or containing chemicals.

In short, if your phone ends between two waves, you will still apply the basic advice usually recommended to owners of non-waterproof phone: immediately take your camera out of the water, remove the battery, sponge.
Top 11 iOS Photo Editing Apps for Filters, Artworks, & Tweaks

Top 11 iOS Photo Editing Apps for Filters, Artworks, & Tweaks


There are many free and paid iPhone apps to work on your photos, turn them into works of art and make you look stunning - here are some favorites.

The standard iOS Photos app has tons of photo editing options Did you know that the iPhone Basic Photo App can do this? Did you know that the base photo app of the iPhone allows this? Apart from the fact that photos and videos are at home on your device, photos are full of surprises. Continue reading . Luckily, if you want to further tweak your photos, there are many more free and paid apps to help you get the job done, turn them into works of art, and make them look stunning.

Remember, not even the best photo editing app can save a poorly taken photo. It's worth spending a few minutes on how to quickly improve your photos. 11 tips to quickly improve your photos Good photos and bad photos are not determined by cameras, but by photographers. Here are 11 tips to help you quickly improve your photos. Take our simple tricks to enhance your Smartphone photography 11 Simple tricks to enhance your Smartphone Photography There are a few tips that are particularly useful when taking pictures with your phone ; They will help you Bring your pictures from "blah" to "fantastic" in no time!

After analyzing over 18 iOS photo editing apps, we selected the best apps for 11 different purposes for you.

1. Best free editing app: Snapseed


If you want to optimize your photos and not spend a penny, Google Snapseed may be the only app you need. It contains nine editing tools (including crop, transform, rotate, image tune and vignette) and 12 filters (including lens blur, grunge, noir and black and white). You can even add a lens blur effect by selectively focusing on a specific area of ​​your photo while gently blurring the rest.
With such a wide range of features, the app got used to, but I found myself intuitive after a week. Snapseed contains useful tutorials that tell you what each effect does and how you can use it to breathe life into your most boring photos.

2. Best paid editing app: Enlight (Paid Version 3.99 $)


Enlight costs $ 3.99, but it pays to pay for it if you want to make sure your photos get the treatment they deserve. Launch the app to see the eight tools on the right. If you select a tool, it will display additional sub-tools. If you select one of these sub-tools, a slider with options will appear at the bottom. Again, you can swipe right or left to change the intensity of the selected effect. So there is much to discover.

For example, choose Image, then Clarity. Below are 10 filters you can use to optimize the brightness, saturation, and sharpness of the photo. Unlike Snapseed, this app lets you turn your photos into graphics, add text boxes, frames and borders, and even create multiple photo collages.

3. Best App for Presets: Photoshop Express (Free)


Adobe Photoshop is the undisputed PC photo editing champion. What can you actually do with Adobe Photoshop? Photoshop can now do a lot more than just edit photos; Some tools from programs like Illustrator have found their way into the software and vice versa. Keep reading for ages, so it's a miracle that Adobe took so long to perfect the mobile app. Nonetheless, the app now feels like an Adobe product with all the tools you need to edit your photos. Although some effects require an Adobe subscription, you will not need them if you are just looking for basic changes.

An Adobe PC standard, well-implemented in mobile apps, is the ability to add your own custom looks and presets, something that designers rely heavily on in the PC version. For example, you can add your own effects, filters, and borders, then apply the same formatting to multiple photos at the same time. You must sign in with an Adobe ID to use this feature. It is completely free.

4. Best App for Perspective Correction: SKRWT (Paid Version $ 1.99)


Most editing apps offer the same functions - cropping, adjusting various parameters such as contrast and brightness, removing red-eye and so on. SKRWT is a fresh breeze in this regard as you can only correct the perspective of your photo. Select a relevant alignment tool below, then swipe right or left to refine your alignment.

You can change the length, width, and even the diagonal perspective of your photo. SKRWT also has tools that allow you to stretch or compress your photo, though you probably do not need it. The features you need after alignment include the useful rotate, crop, and blend tools. It costs a few bucks, but if you're looking for an interesting version of the standard iOS photo editing apps, then this is it.


5. Best for Memes: Aviary Photo Editor (free in-app purchases)

In addition to the usual editing options, you can add text and draw on your photos with Aviary's free app. This can be useful if you want to create a birthday card or a quick invitation. It even has a meme mode that lets you add text to the top and bottom of your photo. Read a brief overview of what makes a good meme and how you can create your own meme. A quick overview of Internet memes and how you can quickly create your own Short overview of Internet memes and how you can quickly create your own Read more. With the app you can also buy more effects packages and stickers for 99 cents each (some of them are free).

6. Best for focus adjustment: After Focus (Paid Version $ 0.99)

Great photographers master the art of focusing on the right subject and gently blurring the rest of the image (read how autofocus works, how autofocus works, how autofocus works, autofocus is a feature of modern cameras that are easy to use) of course, but have you ever stopped wondering how it works, how does your Smartphone work so easily? read more). Even though you can choose your focus area with the phones, the rest of the image will not be completely blurred. There is no way to adjust the aperture in most photo apps, so it is difficult to achieve this effect except in low light.

After Focus is an iPhone app that lets you choose the area you want to focus on (by drawing around it). After that, the rest of the picture is automatically blurred. With the amount of granular control After Focus offers, it's another great app that does one thing but does it well.

7. Best for beautification: Facetune (Paid Version $ 3.99)

Most of us are not blessed with flawless skin and gorgeous pearly white. Fortunately, this app can change the look of a supermodel. Choose your facial treatment feature below (bleaching, smoothing, deleting - for impurities) and then swipe across it to apply this effect to your photo. You can broaden your smile, make your eyes brighter, and even cover your bald spots with hair. It's a brilliant app if you belong to the selfie-obsessed category - like me.

8. Best Free Filter App: Instagram


Instagram needs no introduction. You can add a number of filters to your photos, optimize the filter's intensity, and add subtle lens blur effects. The Facebook app also has a vibrant community of users who use the app for a variety of purposes - especially to envy the rest of us opulence, food and travel.

Some users have become popular just because of their Instagram photos. However, it's a great app because it can only enhance boring photos in just a few clicks. Read more about these 10 useful Instagram tricks 10 Instagram tricks you do not know Exists 10 Instagram tricks you do not know Exists Instagram is constantly evolving and updating, and things are changing fast. Let's find some cool hacks to rock the photo-based social network! Read more that you probably do not know.

9. Best app for filters: Afterlight (Paid Version $ 0.99)

If you thought Instagram had the most filters, think again. After Light has a lot more filters and even two filters can be merged to create a completely new effect.

You can change the effects of each filter and convert your photos into shapes or alphabets - useful when printing birthday cards or posters.

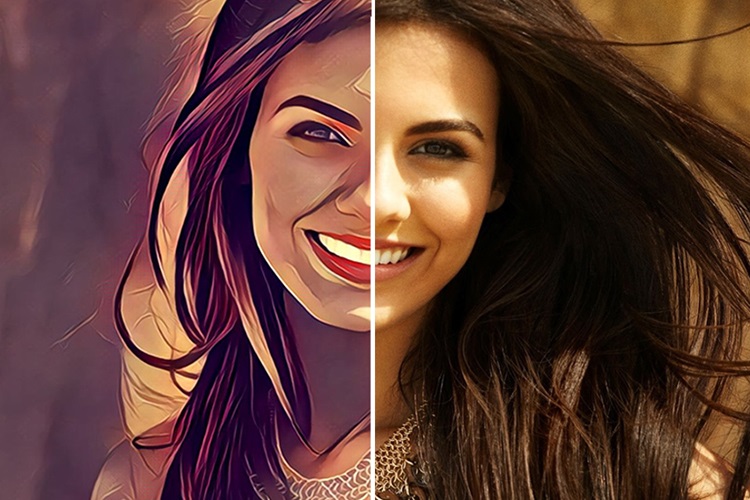
10. Best for creating instant artwork: Prisma (free)


Thanks to Prisma - the new app that has been making headlines since its launch a few years ago. There are (too) many effects to choose from, and you can change the intensity of each effect by swiping across the photo. It sounds relatively simple, but sometimes that works exactly.

11. Best for creating unique works of art: Repix (free)

We've written about the best free apps to turn your photos into works of art. 5 Free Apps to Turn Photos to Android, iOS or Web 5 Free Apps to Turn Art into Art on Android, iOS or the Web Turn your selfies into art with these free creative tools and join the new filter madness now the internet takes over. Read more, but Repix did not create this list. If you want to turn your photos into works of art right away, stay with Prisma. If you want more control over how to turn your photos into works of art, install Repix.

Just select a brush below and tap or swipe over your photo to make it a picture or artwork. Adding raindrops or selectively blurring certain parts of your photo is child's play. Do not worry if you add too many effects, as you can use the undo brush to quickly remove bugs. While the app paid tribute to my wrists, the end result was well worth it.

What is your favorite photo editing app? Comment here